
Introduction to the Best Banana Pudding
Banana pudding is more than just a dessert; it’s a nostalgic trip down memory lane for many. From backyard barbecues to holiday gatherings, this beloved classic has warmed hearts and satisfied sweet cravings for generations. But why is banana pudding so cherished? For starters, its creamy texture pairs beautifully with the subtle sweetness of ripe bananas and the crunch of vanilla wafers, creating layers of delightful flavor that many can't resist.
Did you know that banana pudding has roots in Southern cuisine? It’s often hailed as a staple of comfort food, showcasing simple yet satisfying ingredients. The ease of preparation, especially with a no-cook recipe like ours, means anyone can whip up a batch in no time. Plus, you can customize it to your taste – adding a dash of nutmeg or using organic bananas, for example.
As you dive into this recipe, prepare to impress friends and family alike. They’ll be raving about the best banana pudding they've ever tasted. So let’s get started on creating this deliciously layered treat that’s bound to become a favorite in your household! For more inspiration, check out Serious Eats for tips on banana ripeness and selection.
Ingredients for the Best Banana Pudding
Creating the best banana pudding starts with the right ingredients. Here’s what you’ll need to whip up this delicious dessert:
Required Ingredients
- 2 cups cold milk
- 1 (5-ounce) package instant vanilla pudding mix
- 1 (14-ounce) can sweetened condensed milk
- 1 tablespoon vanilla extract
- 1 (12-ounce) container frozen whipped topping, thawed
- 1 (16-ounce) package vanilla wafers
- 12 small bananas, sliced (feel free to add more if you're a banana lover)
These staples are integral for achieving that rich, creamy vibe that makes banana pudding so beloved.
Optional Ingredients for Added Flavor
If you want to elevate the best banana pudding even further, consider incorporating these optional ingredients:
- A pinch of nutmeg or cinnamon for warmth
- Fresh berries, like strawberries or blueberries, for a splash of color and a tangy twist
- Chopped nuts, such as walnuts or pecans, for crunch
These simple additions can take your pudding from delightful to divine! Want to learn more about enhancing your desserts? Check out this resource on flavor pairings for tips and tricks. Now, let's dive into the recipe!
Preparing the Best Banana Pudding
Creating the best banana pudding starts with a few simple steps and fresh ingredients. This delightful dessert is perfect for any occasion—whether it's a tasty treat for a casual gathering or a standout dish at a potluck. Let's dive into how to prepare this classic dessert!
Gather All Ingredients
Before you begin, it’s essential to assemble all your ingredients so you have everything at your fingertips. Here’s what you’ll need for the best banana pudding:
- 2 cups of cold milk
- 1 (5-ounce) package instant vanilla pudding mix
- 1 (14-ounce) can sweetened condensed milk
- 1 tablespoon vanilla extract
- 1 (12-ounce) container frozen whipped topping, thawed
- 1 (16-ounce) package vanilla wafers
- 12 small bananas, sliced (or more if you’d like!)
Having these ingredients on hand makes the next steps much smoother and more enjoyable.
Combine Milk and Pudding Mix
In a large mixing bowl, combine the cold milk and the instant vanilla pudding mix. Using a whisk, beat the mixture for about two minutes until it thickens. This will create a rich base for your pudding. Ensure that there are no lumps—smooth is the goal here! For an extra touch of expertise, consider checking out detailed pudding techniques from trusted culinary sources like Serious Eats.
Blend in the Sweetened Condensed Milk
Once your pudding mixture is smooth, you can add the sweetened condensed milk. Whisk it together until well incorporated. This step is crucial because the condensed milk will lend an incredible creaminess to your banana pudding.
Fold in the Whipped Topping
Next, gently fold in the thawed whipped topping. This adds volume and lightness to your pudding, making every bite feel luxurious. Be careful not to deflate the whipped cream too much; a gentle hand will keep your dessert airy and fluffy.
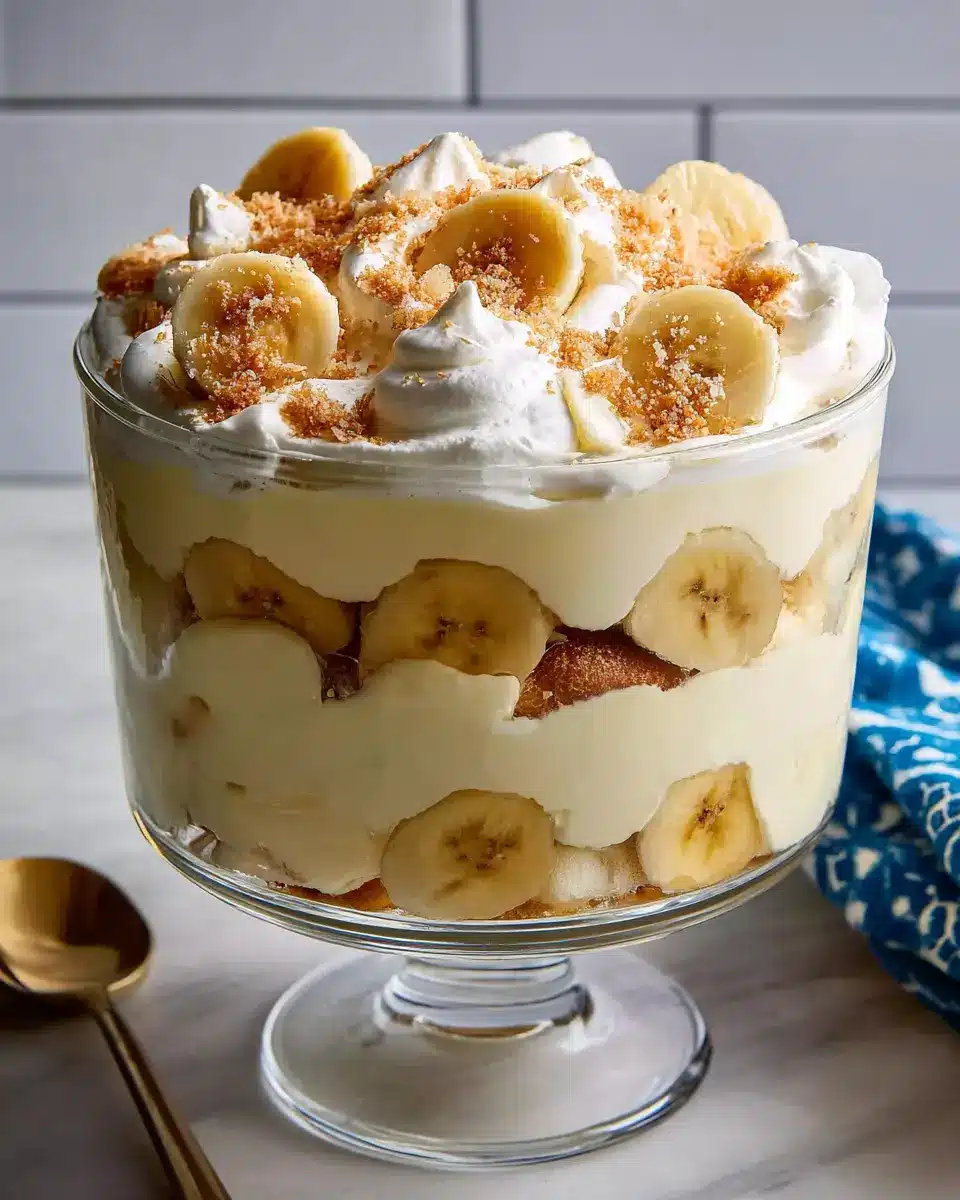
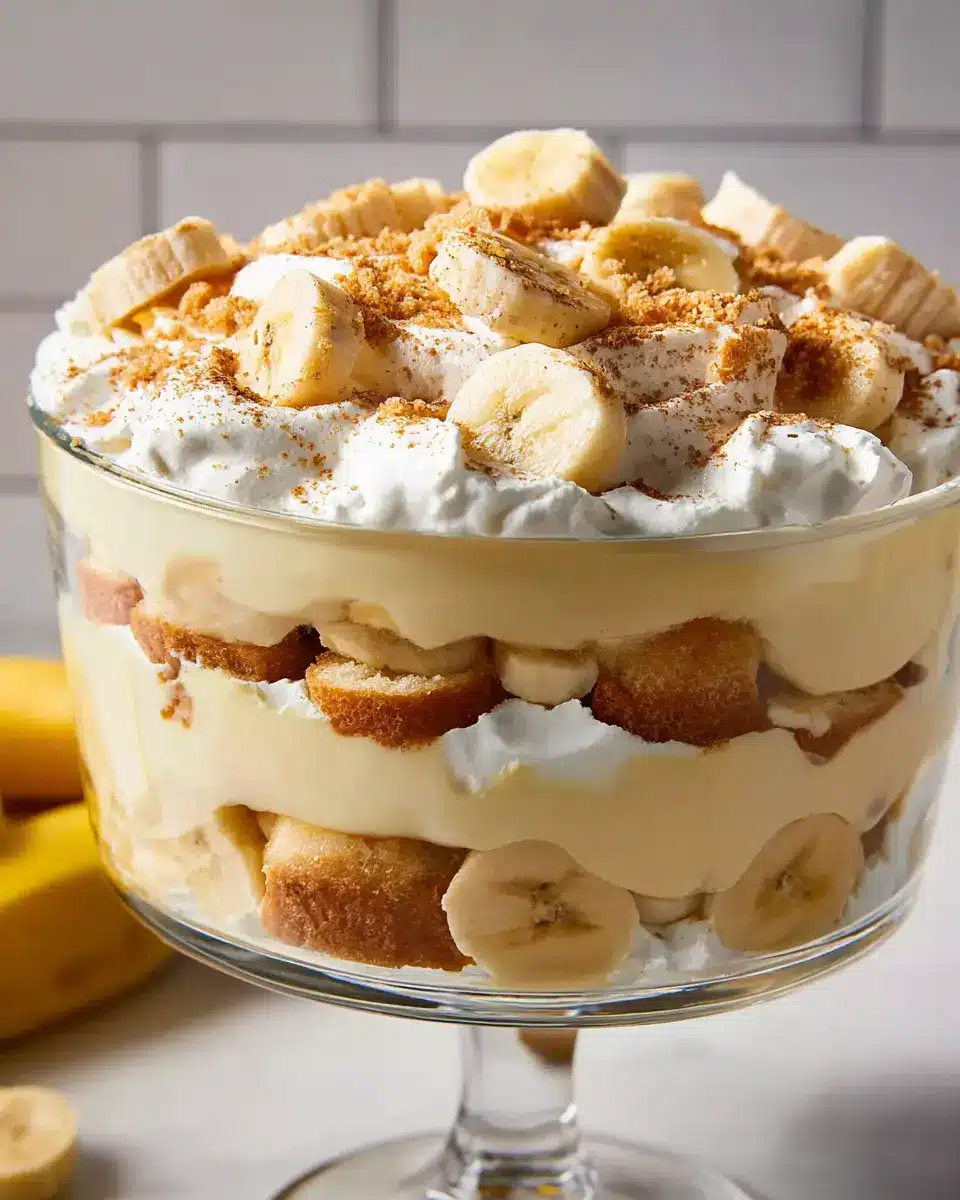
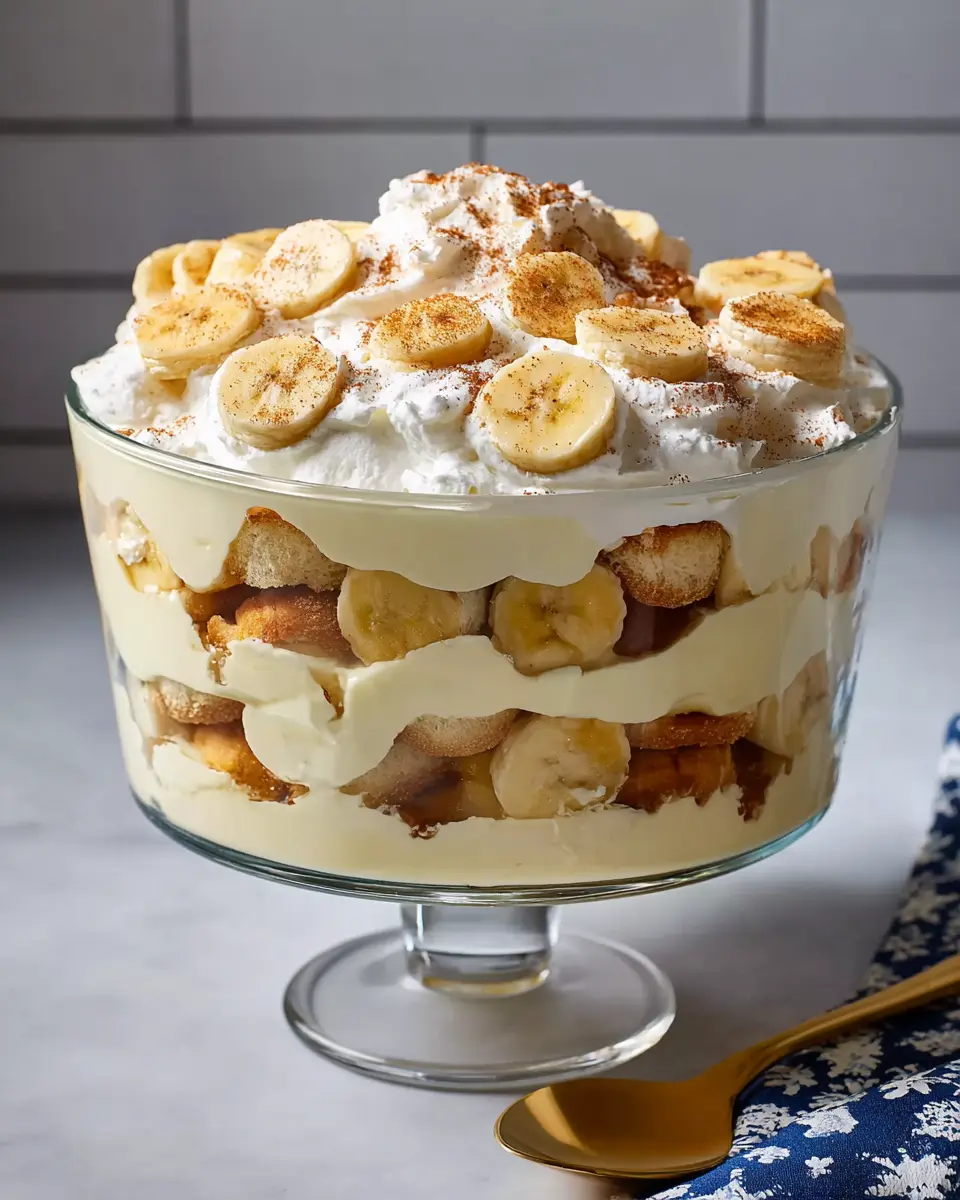
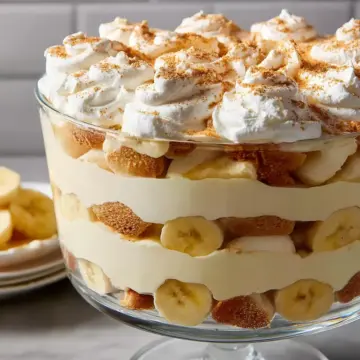
Assemble Layers in a Serving Bowl
Now comes the fun part—layering! Start by placing a layer of vanilla wafers at the bottom of your serving bowl. Follow this with a layer of sliced bananas, then a layer of your pudding mixture. Repeat these layers until all ingredients are used up, topping off elegantly with the pudding layer.
Chill Before Serving
For the best flavor and texture, allow your assembled banana pudding to chill in the refrigerator for at least one hour before serving. This waiting time not only enhances the taste but also allows the layers to meld beautifully. Just before you serve, you might like to add some crushed vanilla wafers on top for that extra crunch!
By following these steps, you’re well on your way to serving up the best banana pudding that will impress friends and family alike. Trust me, once everyone takes a bite, you might just become their new favorite chef!
Variations on the Best Banana Pudding
Chocolate Banana Pudding Twist
If you're looking to shake things up, consider a chocolate banana pudding twist! Simply swap half the vanilla pudding mix with chocolate pudding mix for a rich and decadent dessert. Layer with chocolate wafers instead of vanilla, and you’ll have a delightful treat that pleases any chocolate lover. For an extra touch, drizzle some chocolate syrup between the layers, or sprinkle chocolate shavings on top. Indulging in this variation is like having the best of both worlds, and it’s sure to impress friends at your next gathering!
Nutty Banana Pudding with Pecans or Walnuts
For those who enjoy a bit of crunch, try adding some crushed pecans or walnuts to your banana pudding. Just fold in about a cup of either nut into your pudding mixture before layering. This adds a lovely texture and depth of flavor that complements the creamy bananas beautifully. Top your dessert with some extra nuts for presentation, and enjoy the delightful contrast with each bite. Not only does this version enhance the taste, but it also brings in healthy fats and nutrients. For more about nut benefits, check out this informative webpage from Healthline.
Embrace these variations to make your banana pudding experience even more enjoyable! Whether you're a fan of chocolate or enjoy a nutty crunch, these alternatives transform your classic dessert into something unique. Happy pudding-making!
Cooking Tips and Notes for the Best Banana Pudding
Ensuring Perfect Layers and Texture
For the best banana pudding, achieving those gorgeous layers is key. Start by using a clear glass bowl; it really allows you to see the beautiful layers of creamy pudding, bananas, and vanilla wafers. When layering, alternate each ingredient carefully—this not only looks appealing but also ensures every bite is deliciously balanced.
To keep the bananas from browning, consider tossing them in a bit of lemon juice before layering. Additionally, letting your banana pudding chill for at least an hour allows the flavors to meld beautifully, making the texture even creamier. Remember, patience is vital when assembling the perfect dessert!
Need more tips? Check out this helpful guide on banana pudding variations.
Serving Suggestions for the Best Banana Pudding
When and How to Serve Banana Pudding
Banana pudding is perfect for any occasion, from casual weeknight dinners to festive gatherings. Serve this delightful dessert chilled, ideally after allowing it to sit in the refrigerator for at least an hour. This not only enhances the flavors but also allows the layers to meld beautifully. For a classic touch, consider garnishing with crushed vanilla wafers or fresh banana slices right before serving to add some texture.
Creative Presentations for Gatherings
Elevate your best banana pudding experience with fun and unique presentations. Instead of a traditional bowl, opt for individual serving cups—perfect for parties! Layer the pudding, wafers, and bananas in clear jars or cups to showcase the beautiful layers. You can also create a banana pudding trifle by using a larger glass dish, making it a stunning centerpiece. Pair with alternatives like hot cocoa or spiced apple cider for a delightful drink combo that complements the sweet flavors of banana pudding. Looking for inspiration? Check out Martha Stewart's dessert ideas for more creative serving suggestions.
Time Breakdown for the Best Banana Pudding
Preparation Time
Making the best banana pudding doesn't take long at all! Set aside just 25 minutes for preparation, and you'll be on your way to a delightful dessert in no time.
Chilling Time
For the flavors to meld beautifully, allow your pudding to chill in the refrigerator for at least 1 hour. This step is crucial for achieving that perfect creamy texture.
Total Time
In total, you'll spend 25 minutes preparing and then an additional hour chilling—so plan for around 1 hour and 25 minutes before you can dive into this delicious treat!
Making this banana pudding is a breeze, perfect for gatherings or a cozy night in. If you're curious about more recipe tips, check out Allrecipes for inspiration!
Nutritional Facts for the Best Banana Pudding
Understanding the nutritional breakdown of the best banana pudding can help you enjoy it guilt-free. Here’s a quick look:
Calories
Each serving contains approximately 329 calories. This makes it a satisfying yet indulgent treat.
Sugars
With around 29 grams of total sugars, including natural sugars from bananas, this dessert balances sweetness with fresh flavor.
Protein
You’ll find about 4 grams of protein per serving, which comes from the milk and pudding mix, adding a touch of nourishment to your delightful dessert.
For more insights on healthy desserts, check out Healthline's article discussing ways to enjoy sweets while staying nutrition-conscious!
FAQs about the Best Banana Pudding
Can I make banana pudding ahead of time?
Absolutely! In fact, making the best banana pudding ahead of time can enhance its flavor as the layers meld together. You can prepare everything a day in advance and refrigerate it. Just keep in mind that it’s best to wait until right before serving to add the banana slices on top to keep them fresh.
How do I keep the bananas from browning?
To prevent your bananas from browning too quickly, toss the slices in a little lemon juice before layering them in your pudding. This simple trick not only preserves their color but also adds a hint of flavor.
What’s the best way to store leftover pudding?
Store any leftovers in an airtight container in the refrigerator. This will help maintain the creamy texture of the best banana pudding. The pudding is best enjoyed within 1-2 days, so make sure to savor every last bite!
If you're looking for more tips, check out Food Network's guide on banana storage for an extended freshness experience!
Conclusion on the Best Banana Pudding
In conclusion, this recipe offers the best banana pudding experience with its creamy layers and delightful banana slices. Perfect for gatherings, it brings joy and nostalgia in every bite. Don’t forget to chill before serving for maximum flavor. Your friends will definitely come back for seconds! Enjoy!
The Best Banana Pudding
Equipment
- large bowl
Ingredients
- 2 cups cold milk
- 1 5-ounce package instant vanilla pudding mix
- 1 14-ounce can sweetened condensed milk
- 1 tablespoon vanilla extract
- 1 12-ounce container frozen whipped topping, thawed
- 1 16-ounce package vanilla wafers
- 12 small bananas, sliced or more as needed
Instructions
- Gather all ingredients.
- Place milk and pudding mix in a large bowl; beat with a whisk for 2 minutes. Whisk in condensed milk until smooth.
- Stir in vanilla, then fold in whipped topping.
- Arrange a layer of wafers in the bottom of a glass serving bowl. Top with a layer of banana slices, then a layer of pudding mixture; repeat layers until all ingredients are used.
- For best results, chill pudding in the refrigerator for at least 1 hour before serving. Top with extra crushed wafers just before serving.
- Enjoy!

Leave a Reply