
Introduction to Rustic Italian Crusty Bread
When it comes to comfort food, nothing quite compares to freshly baked rustic Italian crusty bread. The warm, inviting aroma that fills your kitchen can instantly uplift your mood and transform your home into a cozy retreat. But why should you consider baking your own bread instead of picking up a loaf from the store?
Why Bake Your Own Rustic Italian Bread?
-
Quality Control: Baking at home allows you to choose the very best ingredients—think organic flour, natural yeast, and no preservatives. You’ll create healthier bread, free from unnecessary additives.
-
Economical: Homemade bread can be more cost-effective than store-bought options, particularly when you bake in bulk. Additionally, the satisfaction you'll gain from making your own loaf is priceless.
-
Customization: With a rustic Italian crusty bread recipe, you have the freedom to experiment! Want to add herbs, garlic, or even olives? Go for it!
-
Community Connection: Baking bread can bring people together. Share your creations with friends or family and forge connections over delicious homemade meals.
Ready to unleash your inner baker? Let’s dive into the delightful world of homemade rustic Italian crusty bread! For a simple yet rewarding recipe, continue reading to find out how to create this artisanal delight in just a few easy steps. For more tips on bread baking, you might find this guide helpful!
Ingredients for Rustic Italian Crusty Bread
Essential ingredients for the perfect loaf
When embarking on your rustic Italian crusty bread recipe, the right ingredients are key to achieving that delicious crust and airy interior. Here are the essentials you’ll need:
- All-purpose flour: 3.25 cups (plus more for dusting) to create a strong gluten structure.
- Sea salt: 1 teaspoon, which not only enhances flavor but also helps regulate yeast activity.
- Warm water: 1.5 cups, ideally between 100°F to 110°F to activate the yeast.
- Instant yeast: 2 teaspoons (or active dry yeast), your leavening agent for that perfect rise.
These simple ingredients come together to create something truly special. For a deeper dive into the science behind bread-making, check out King Arthur Baking.
Optional ingredients for a personal twist
Feel free to personalize your loaf with some optional ingredients that can elevate your rustic Italian crusty bread recipe:
- Olive oil: Adds moisture and a hint of flavor—consider using a high-quality extra virgin for a rich taste.
- Herbs: Dried oregano or rosemary can infuse your bread with Mediterranean flair.
- Cheese: Freshly grated parmesan or mozzarella can add a delightful twist, making for a cheesy crust.
Experimenting with these additional flavors allows you to make this recipe uniquely yours. Get creative and enjoy the process!
Step-by-step Preparation of Rustic Italian Crusty Bread
Creating the perfect loaf of rustic Italian crusty bread is not just about following a recipe; it's a delightful experience that fills your kitchen with enchanting aromas. Let’s walk through the steps together, ensuring you’ve got all the details you need to achieve that golden-brown crust and soft interior.
Gather Your Ingredients
Before we dive in, it’s essential to have everything you need athand. Here’s your shopping list:
- 3.25 cups all-purpose flour (plus extra for dusting)
- 1 teaspoon sea salt
- 1.5 cups warm water
- 2 teaspoon instant yeast (or active dry yeast)
Having your ingredients prepared means less stress and more joy during the process.
Combine Flour, Salt, and Yeast
In a large mixing bowl (or the bowl of your trusty kitchen mixer), combine the flour, salt, and yeast. It's vital to mix these dry ingredients well to ensure your yeast activates evenly during the rising process. Using a spatula or the paddle attachment, give it a gentle stir. For a deeper dive into yeast types, check out The Spruce Eats.
Add Warm Water and Mix into a Dough
Now, pour the warm water into the flour mixture. The key here is warm, not hot. You want the temperature to gently awaken the yeast without killing it. Mix until everything is combined; it's okay if the dough is sticky. This stickiness is a sign of a wet dough, which is integral for that artisanal crumb we all admire!
Allow the Dough to Rise
Cover your bowl with plastic wrap and a tea towel, allowing the dough to sit at room temperature for 2 to 3 hours or until it’s doubled in size. Patience is key here! This rise is what will give your bread its airy structure.
Shape the Dough Without Kneading
Once risen, sprinkle some flour on your counter and turn the dough out—don’t worry about its stickiness; that’s normal. With floured hands, gently fold the dough onto itself to form a round shape. The goal is to treat it tenderly to maintain the air bubbles inside. You can even draw a simple ‘X’ or a few cuts on top to let it vent while it bakes.
Preheat the Oven and Prepare for Baking
While your dough is resting, preheat your oven to 450°F with a pizza stone inside—yes, this helps achieve that crusty finish we’re after! Don’t forget to place an oven-proof dish filled with water on the bottom rack; it creates steam, enhancing the crust's texture.
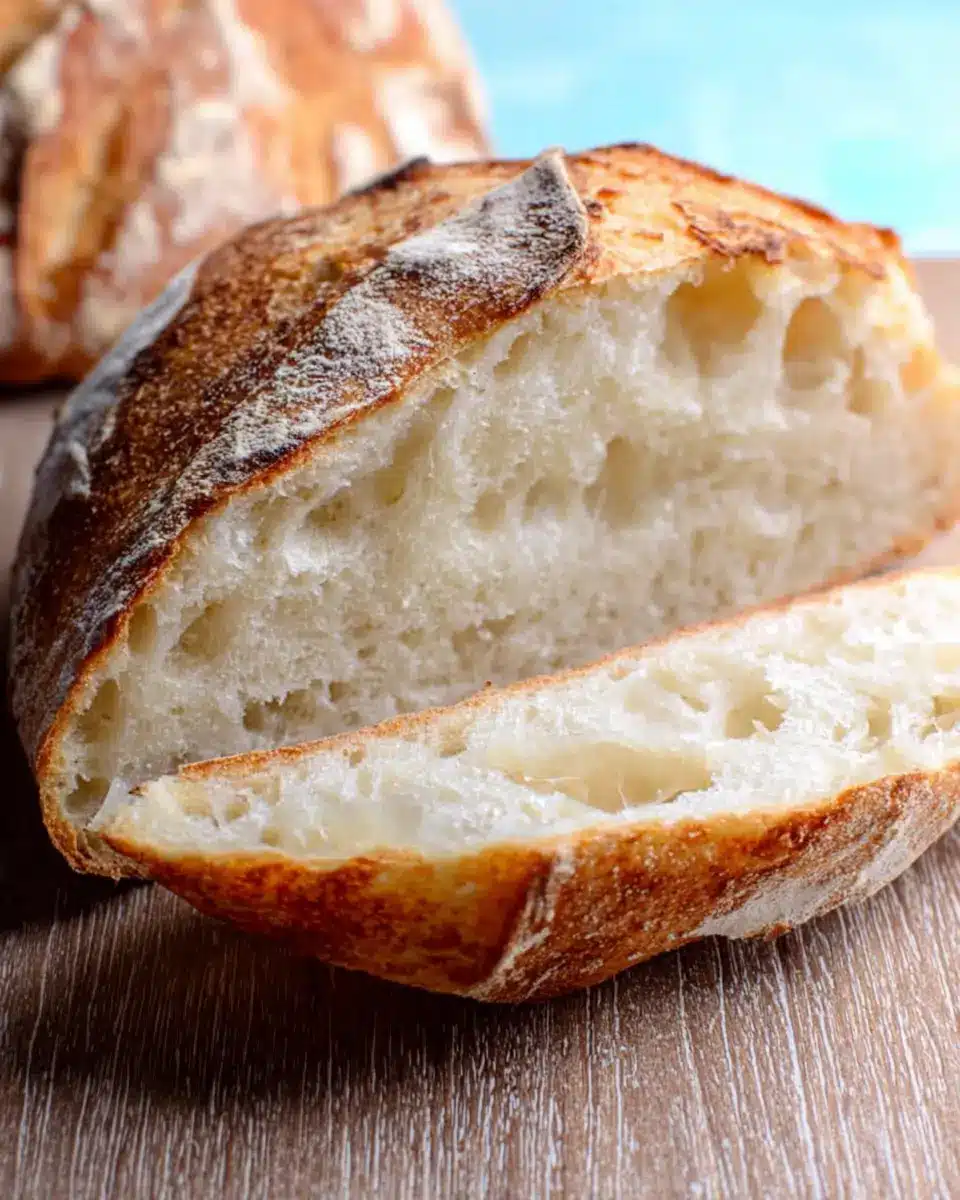
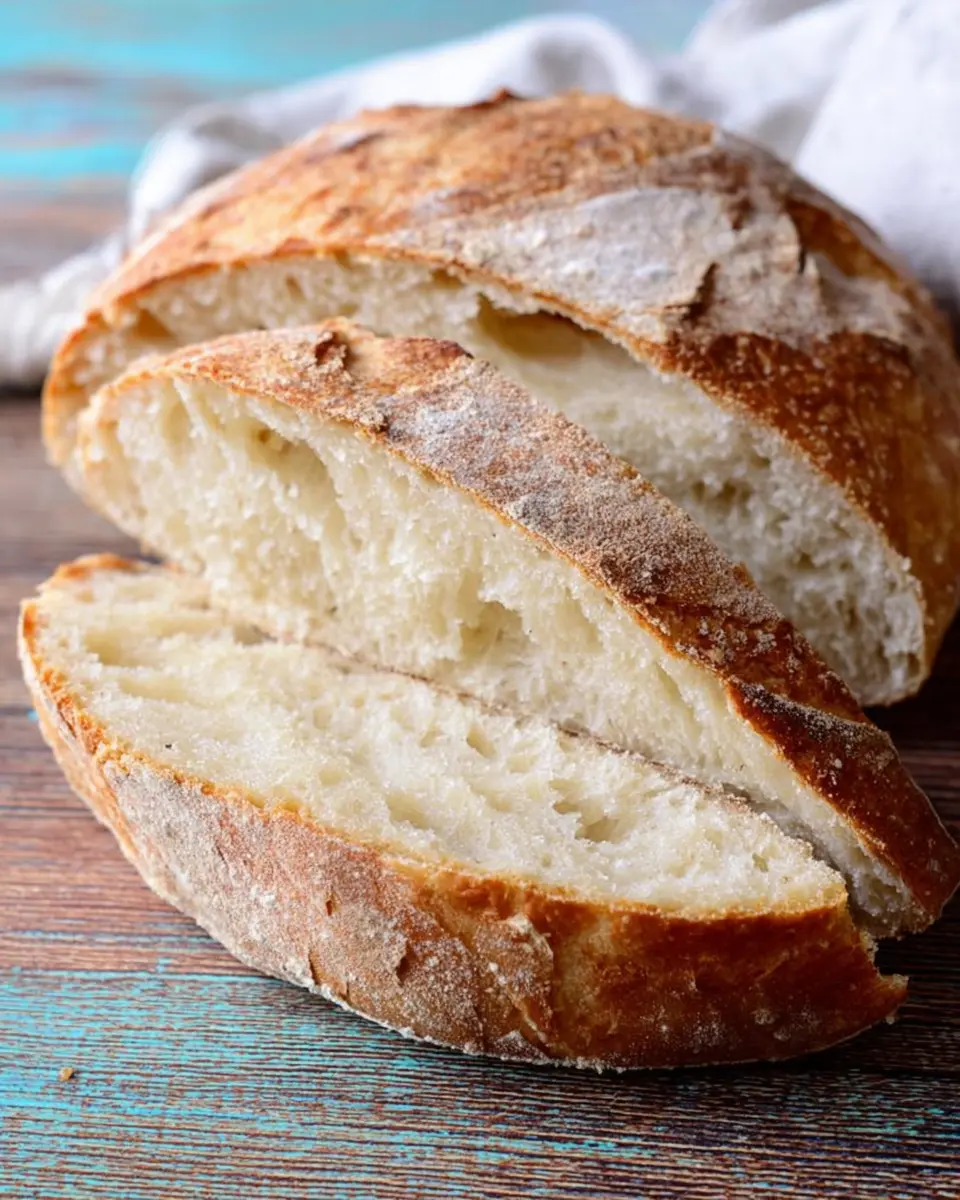
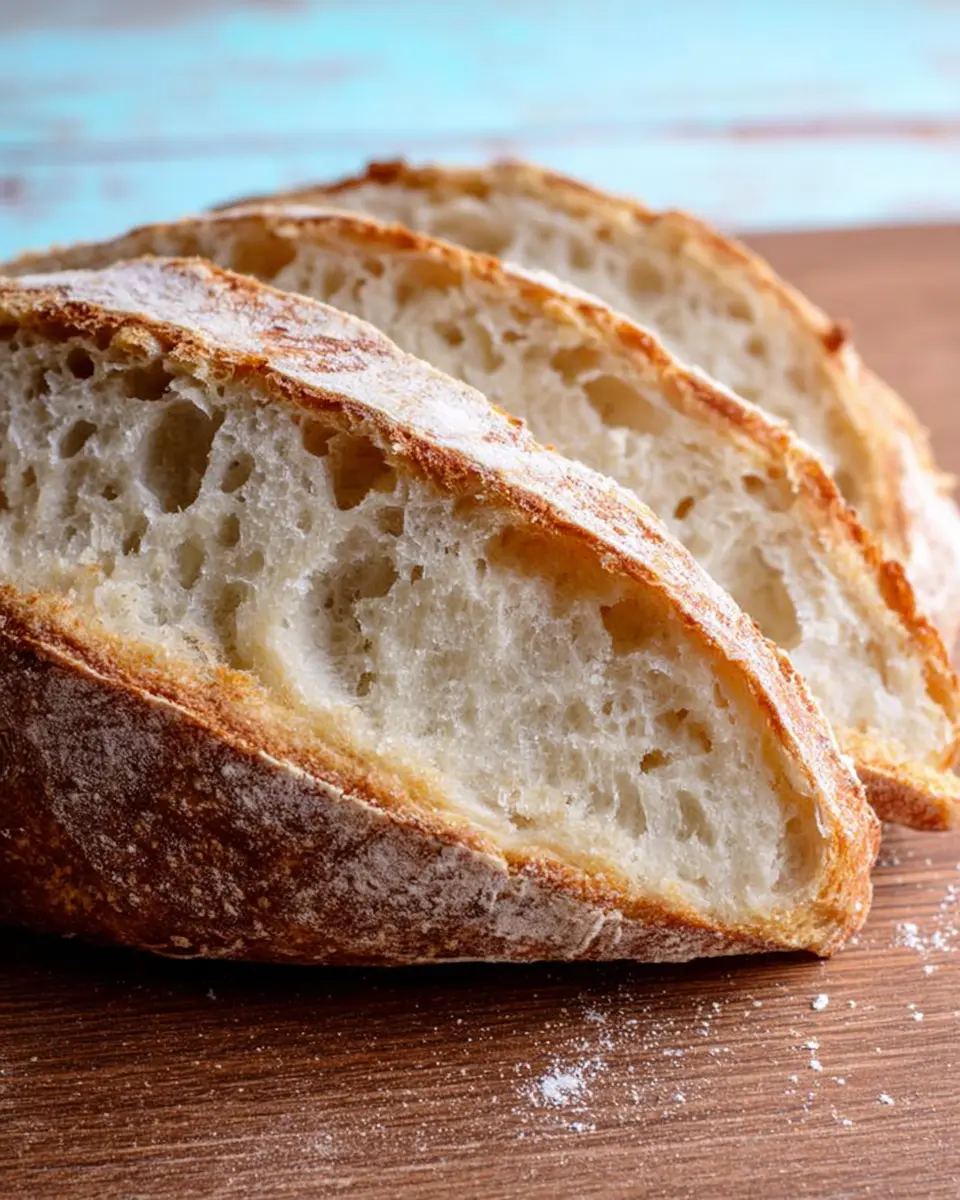
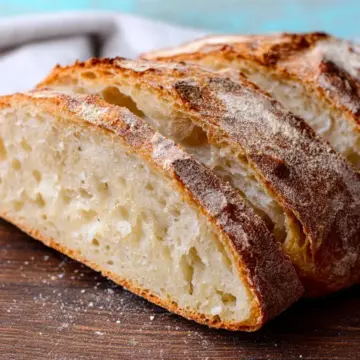
Bake and Achieve That Crusty Finish
Now for the grand finale! Sprinkle some semolina flour or cornmeal on your pizza stone to prevent sticking, then carefully slide your dough onto it. Bake your bread for about 30 to 45 minutes until it has a glorious golden color. Once done, transfer it to a cooling rack but resist the urge to slice right away—let it cool completely to keep that crust crispy.
And there you have it, a truly satisfying baking adventure with a simple rustic Italian crusty bread recipe that will wow your friends and family (or just treat yourself!). Happy baking!
Variations on Rustic Italian Crusty Bread
Herb-infused rustic bread
Why not elevate your rustic Italian crusty bread recipe by infusing it with fresh herbs? Try adding a tablespoon of your favorite herbs—like rosemary, thyme, or oregano—directly into the dough. Not only will this enhance the flavor, but the aromatic scent will fill your kitchen as it bakes. You could even mix in garlic powder for an extra punch!
Olive and sun-dried tomato addition
For a Mediterranean twist, consider tossing in chopped olives or sun-dried tomatoes. These ingredients add not only a rich flavor but also a lovely texture to your loaf. About half a cup of either will do the trick; just ensure they’re evenly distributed in your dough. This variation pairs beautifully with soups and salads, making your rustic bread a perfect accomplice to any meal.
Explore more ways to customize your bread by checking out expert tips on baking bread for additional flavor combinations and techniques!
Cooking Tips and Notes for Rustic Italian Crusty Bread
Importance of Steam for Crust
Creating a perfect crust on your bread is all about steam! When you bake your rustic Italian crusty bread, incorporating steam into the oven helps the outer layer expand, resulting in that desirable crunch. Place an oven-proof dish filled with water on the bottom rack to generate steam—this small step can make a big difference. For extra guidance, check out this baking science article that elaborates on why steam is essential.
Cooling Tips for Maintaining That Crusty Texture
Cooling your bread properly is just as crucial as the baking process. Once you take your bread out of the oven, transfer it to a wire cooling rack. This allows air to circulate underneath, preventing sogginess. Alternatively, let it cool in the oven with the door slightly ajar, which helps maintain that irresistible crust. Remember, patience is key here—allowing the bread to cool completely ensures that the crunch remains intact when you slice into it!
Serving Suggestions for Rustic Italian Crusty Bread
Pairing with spreads and dips
There’s nothing quite like a warm slice of rustic Italian crusty bread with a variety of spreads or dips. Consider serving it with:
- Olive oil and balsamic vinegar: A simple yet elegant choice. Drizzle some high-quality extra virgin olive oil and balsamic for dipping.
- Hummus: The creamy texture provides a delightful contrast to the crunchy crust.
- Artichoke or spinach dip: Pair this warm, cheesy dip with slices for a cozy appetizer.
Serving alongside Italian dishes
Elevate your meal experience by using rustic Italian crusty bread as a side to your favorite Italian dishes:
- Pasta marinara: Sopping up the rich sauce with bread adds a hearty touch.
- Ratatouille or Caponata: These vegetable dishes become even more delicious with a side of crusty bread.
- Soups: Enjoy it dipped in a warm bowl of minestrone or ribollita for a comforting meal.
With these serving suggestions, you'll not only enjoy the bread but also create an inviting dining atmosphere. What’s your favorite way to enjoy it?
Time Breakdown for Rustic Italian Crusty Bread
Prep Time
Give yourself just 5 minutes for the initial prep in this rustic Italian crusty bread recipe. In that short time, you’ll mix your flour, salt, yeast, and warm water!
Rise Time
The dough needs some time to work its magic. Allow it to rise at room temperature for about 2 to 3 hours, giving it plenty of time to double in size. You can use this time to plan dinner or catch up on your favorite show!
Baking Time
Once your dough has risen, it’s time for the grand finale. Preheat your oven to 450°F, and allow your crusty bread to bake for 30 to 45 minutes until it’s beautifully golden brown. Enjoy the aroma filling your home as it bakes!
Nutritional Facts for Rustic Italian Crusty Bread
Calories
A slice of this rustic Italian crusty bread contains approximately 195 calories. It's a light yet satisfying choice, perfect for enjoying on its own or as part of a meal.
Macronutrients Breakdown
- Carbohydrates: 40g
- Protein: 6g
- Fat: 1g (with only 1g from saturated fat)
- Sodium: 295mg
- Fiber: 2g
- Sugar: 1g
With a solid dose of carbohydrates for energy and a bit of protein to help keep you full, this delicious bread strikes a good balance for your baking endeavors. For more details on bread nutrition, take a look at resources from the USDA.
Adding this bread to your meals can complement various dishes, making it a versatile staple in your kitchen. Whether served alongside soups, salads, or as a base for your favorite toppings, it promises flavor and substance in every bite!
FAQs about Rustic Italian Crusty Bread
Can I use different types of flour?
Absolutely! While the rustic Italian crusty bread recipe calls for all-purpose flour, feel free to experiment with other types like bread flour or whole wheat flour for added flavor and texture. Just keep in mind that different flours may absorb water differently, so you might need to adjust the liquid as necessary. For a nutty flavor, consider adding some rye flour too!
What can I do if the dough is too sticky?
Don’t worry if your dough feels tacky—it’s part of the charm! To make it more manageable, use a generous amount of flour when shaping. Alternatively, let it rest a bit longer; sometimes, extra time can help the gluten relax. If it’s exceptionally sticky, add a tablespoon of flour at a time until you reach a consistency that's easier to work with, just be careful not to overdo it.
How long does this bread stay fresh?
Once cooled, your rustic Italian bread will stay fresh for about 2 to 3 days when stored in a bread box or paper bag. To keep it crusty, avoid plastic bags! If you want to extend its life, consider freezing it. Wrap it tightly in plastic wrap and foil, and it can last up to 3 months. Just pop it in the oven to re-crisp before enjoying!
Conclusion on Rustic Italian Crusty Bread
This rustic Italian crusty bread recipe is not just a baking project; it's an experience to savor. With minimal effort and a touch of patience, you’ll create a golden, crispy loaf that complements any meal. Perfect for sharing, it's sure to impress family and friends alike. Enjoy!
Rustic Italian Crusty Bread Recipe
Equipment
- Mixing bowl
- pizza stone
- sharp knife
- Cooling Rack
- Dutch oven
Ingredients
- 3.25 cups all purpose flour plus more for dusting
- 1 teaspoon sea salt
- 1.5 cups warm water
- 2 teaspoon instant yeast or active dry yeast
Instructions
- In a large mixing bowl or your kitchen aid mixer add the flour, salt and yeast. Use a spatula or the paddle attachment and mix to combine well.
- Pour in the warm water and keep mixing until everything is incorporated and a soft dough has formed. It will still stick to the bottom of the bowl and that is OK.
- Cover the bowl with some plastic wrap loosely and a tea towel. Allow the dough to rise at room temperature for 2 to 3 hours until doubled in size.
- Sprinkle some flour on your kitchen counter and dump the bread dough on it. Flour your hands to help it out of the bowl as it will be sticky. Don't panic, this is normal.
- With floured hands fold the dough onto itself forming it into a round ball. Do not knead it, do not handle it anymore than you need to.
- Use a sharp knife and lightly carve an X in the top of the loaf or just make a few cuts across.
- Place the bread dough on top of a lightly floured pizza peel, cardboard or parchment paper and allow it to rest while your oven is heating up.
- Preheat your oven to 450°F with a pizza stone inside for about 45 minutes before baking the bread. Fill an oven proof bowl with 2 inches of water and place it on the bottom rack.
- Once your oven is hot sprinkle the pizza stone with some semolina flour or corn meal and carefully slide the bread loaf on top. Bake the bread for about 30 to 45 minutes until golden brown all over and cooked through.
- Transfer the bread to a cooling rack and allow to cool off completely before slicing into it.
- Instead of a pizza stone preheat your oven with a dutch oven inside. Once hot, carefully place the bread loaf inside the dutch oven ideally using parchment paper for easy transfer. Cover with the lid and bake for 30 minutes. Remove lid and bake another 5 minutes until golden brown on top.
- Remove the bread from the dutch oven and transfer to a cooling rack or it won't stay crispy.


Leave a Reply