
Introduction to Small Batch Crusty Bread
Why Make Bread at Home?
Baking bread at home is a delightful experience that invites you into the wonderful world of aromas and flavors. Have you ever enjoyed that warm, crusty loaf fresh from the oven? It’s a simple yet rewarding process that transforms basic ingredients into something magical. Plus, homemade bread allows you to control the ingredients, ensuring you skip the preservatives often found in store-bought varieties. A study from the USDA highlights that homemade food can often be healthier, as you can opt for organic or whole grain flours and tailor flavors to your liking.
Benefits of Small Batch Baking
Small batch baking, like our small batch crusty bread, is perfect for those with limited space or who prefer to keep things simple. Rather than committing to massive quantities, this approach allows you to enjoy fresh bread without wastage. And the best part? You only need about 2 hours from start to finish, making it an ideal weekend project or after-work treat. With just one small loaf yielding 2-4 servings, it’s perfect for a cozy night in or for impressing guests. Plus, making smaller batches means less cleanup—an absolute win!
Ready to dive in? Grab those ingredients, and let’s bake! For tips on measuring flour accurately, check out this guide on baking basics.
Ingredients for Small Batch Crusty Bread
Essential ingredients overview
Creating your own small batch crusty bread is not only simple but also incredibly rewarding! For this delightful loaf, you’ll need:
- Active dry yeast: This helps your bread rise and gives it that perfect texture.
- Honey: A touch of sweetness that balances the flavors (you can substitute with sugar if needed).
- Warm water: Activates the yeast and brings all the ingredients together.
- Kosher salt: Enhances flavor and strengthens gluten.
- All-purpose flour: The foundation of your bread—opt for high-quality options like King Arthur Flour or Bob's Red Mill.
Alternative ingredient suggestions
Want to mix things up? Here are some ideas:
- Flour alternatives: Try whole wheat or bread flour for a different flavor and texture.
- Sweetener swap: Maple syrup or agave nectar can replace honey for a unique taste.
- Salt options: If you’re out of kosher salt, use sea salt—just adjust the quantity to avoid over-salting.
Experimenting with these alternatives can lead to delicious new variations on this classic recipe! Whether you’re a seasoned baker or just starting out, this small batch crusty bread will surely impress!
Step-by-step Preparation of Small Batch Crusty Bread
Creating the perfect loaf of small batch crusty bread is a gratifying undertaking that fills your kitchen with warmth and irresistible aromas. Follow this straightforward guide, and you'll be savoring your homemade masterpiece in no time!
Combine Yeast Mixture
Start by gathering your ingredients. In a large mixing bowl, combine 1 teaspoon of active dry yeast, 1 teaspoon of honey, and ⅔ cup of warm water (about 110°F). Stir gently and let it sit for around 5 minutes. You’re looking for a foamy layer to form – this means the yeast is activated and ready to work its magic! For a deeper dive into yeast, check out this excellent resource from King Arthur Baking.
Mix the Dough and Let it Rise
Once your yeast mixture is frothy, add 1 to 1 ⅔ cups of all-purpose flour and 1 teaspoon of kosher salt. Mix with a sturdy spatula until the dough starts to come together. The mix should feel slightly loose and shaggy. This is your dough’s first phase! Cover the bowl with a towel and allow it to rise in a warm spot for about 1 hour, or until it has doubled in size. During this time, the flavors will develop beautifully.
Shape the Dough for the Second Rise
After the first rise, lightly flour a cutting board. Gently turn the dough out onto the board, being careful not to deflate it by punching it down. Shape the dough into a round loaf by folding the edges into the center several times. Once it feels resilient, place the shaped loaf seam-side down into a lightly floured bowl. Cover it again with a towel and let it rise for 30 minutes. This final rise is crucial for developing that chewy interior we love in a crusty bread.
Prepare Your Oven and Dutch Oven
While your dough undergoes its second rise, it's time to preheat your oven. Place a Dutch oven (with the lid on) into your oven and heat it to 460°F. Preheating the Dutch oven will provide the steam needed for a perfect crust. If you’re unsure about what Dutch oven to choose, take a look at this guide from Cook's Illustrated for some helpful insights.
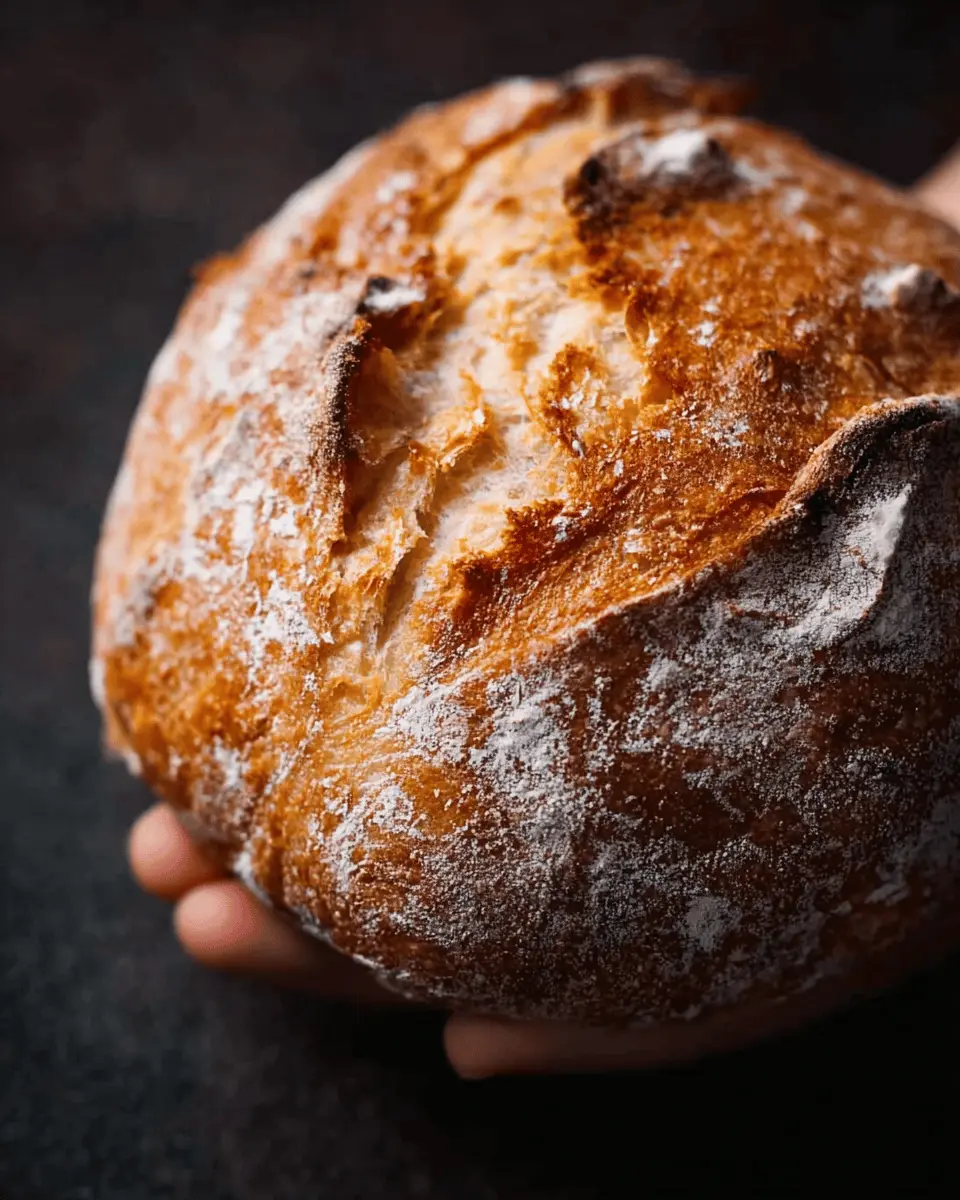
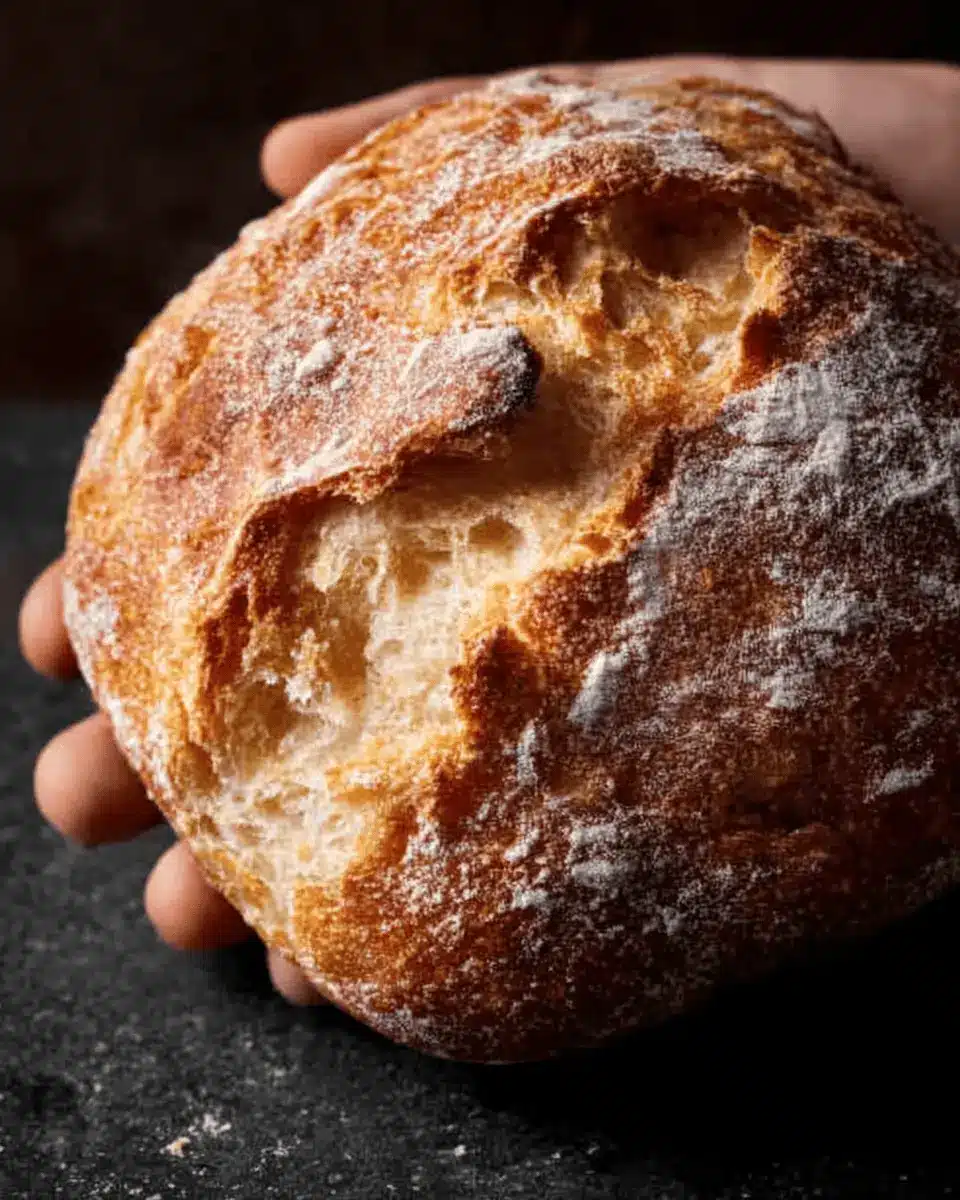
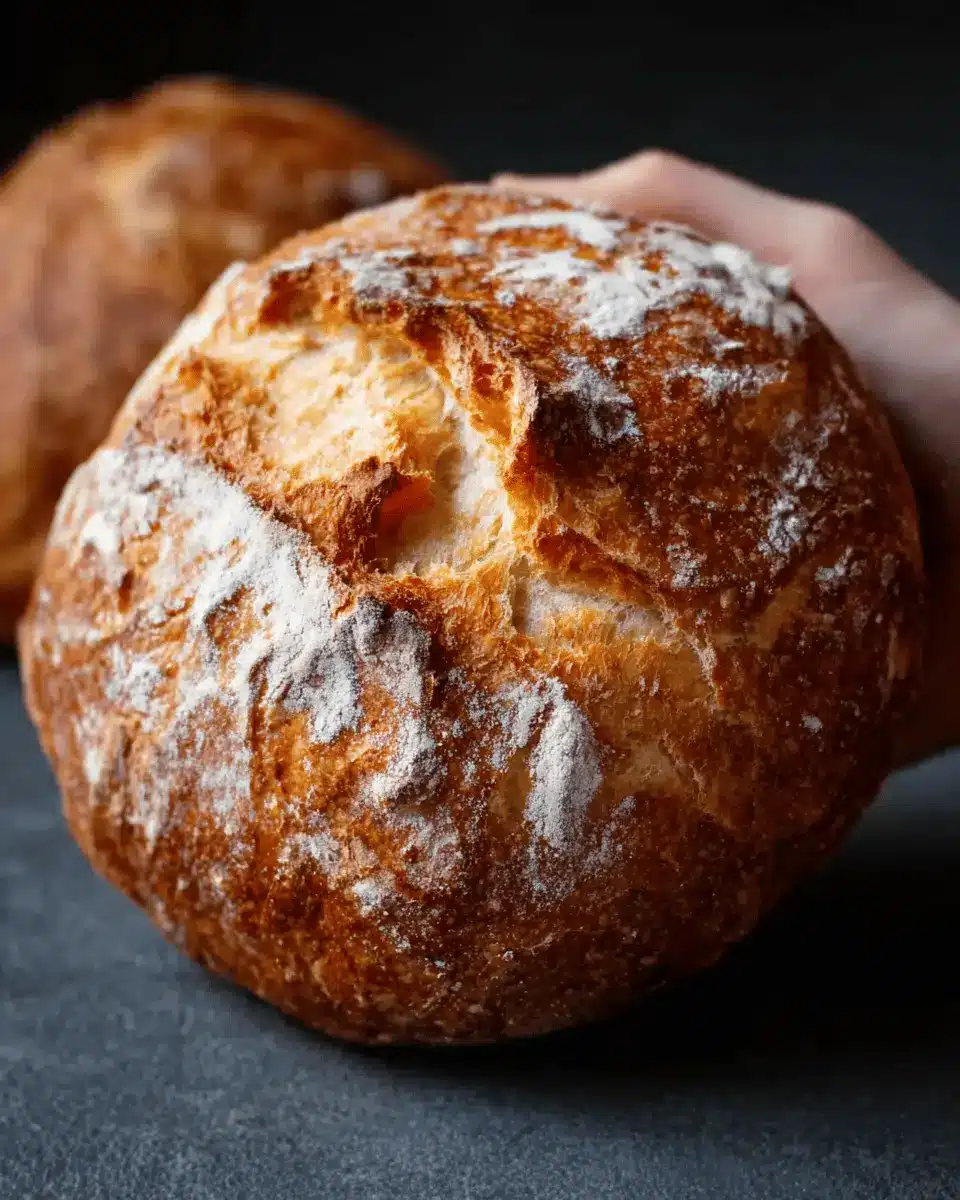
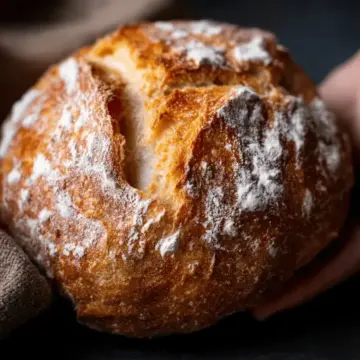
Bake to Perfection
Once your oven is hot and your dough is ready, it's time for the fun part! Flip the dough seam-side up onto a piece of parchment paper. Use oven mitts to carefully remove the Dutch oven's lid and lift the loaf into it on the parchment. Cover it back up and slide it into your preheated oven. Bake for 22 minutes, then remove the lid to let the crust brown further for another 5-10 minutes. This process ensures a saucy interior and a perfectly crusty exterior that will make your small batch crusty bread irresistible. After baking, let your bread cool on a wire rack for at least 30 minutes before slicing. Enjoy!
By following these steps, you’re guaranteed to create a delicious small batch of crusty bread that will wow your guests or simply elevate your next meal. Happy baking!
Variations on Small Batch Crusty Bread
Olive and Herb Crusty Bread
Elevate your small batch crusty bread with the vibrant flavors of olives and fresh herbs! Simply mix in ⅓ cup of chopped olives (like Kalamata or green olives) and a tablespoon of your favorite herbs—rosemary, thyme, or basil work beautifully. These additions not only provide a delightful twist but also make your kitchen smell heavenly as the bread bakes. Pair it with a selection of cheeses for a perfect brunch spread.
Whole Wheat Crusty Bread
If you’re looking for a healthier twist, consider making whole wheat crusty bread. Swap out half of the all-purpose flour for whole wheat flour to add a nutty flavor and nutritional punch. You might notice the dough is a bit denser, so feel free to add a splash more water to achieve that signature shaggy texture. This variation is also fantastic for sandwiches filled with spreads like hummus, turkey bacon, or chicken ham. Enjoy experimenting with these delicious variations!
For more inspiration, check out our Roasted Garlic and Rosemary Bread to see how you can infuse bold flavors into your bread-making!
Cooking Tips and Notes for Small Batch Crusty Bread
Measuring Ingredients Accurately
Getting your measurements right is crucial for this small batch crusty bread. For best results, invest in a kitchen scale and measure ingredients by weight, particularly flour. Did you know that different brands can vary significantly in weight per cup? This ensures that you’ll achieve that perfect dough consistency every time.
Common Mistakes to Avoid
- Too Much Flour: Don’t add extra flour during mixing; the dough will be slightly sticky but will smooth out as it rises.
- Skipping the Resting Time: Give the dough time to rise—this creates those lovely air pockets in your bread.
- Not Preheating the Dutch Oven: A hot oven is essential for that beautifully crusty exterior, so don’t rush this step!
Want tips on perfecting your bread-baking skills? Check out The Perfect Loaf for in-depth tutorials and techniques!
Serving Suggestions for Small Batch Crusty Bread
Pairing with Spreads and Toppings
There’s nothing quite like fresh small batch crusty bread to elevate your meal! Consider pairing it with:
- Creamy spreads: Whipped goat cheese, hummus, or butter infused with herbs add a delightful touch.
- Savory toppings: Layer on some turkey bacon or a slice of chicken ham for a satisfying bite.
- Sweet options: Drizzle with honey or spread with your favorite jam for a cozy breakfast.
With endless combinations, it’s the perfect canvas for your culinary creativity!
Ideal Occasions for Serving Bread
This warm, crusty loaf shines on many occasions:
- Casual brunches: Serve alongside salads or omelets for relaxed weekend dining.
- Family dinners: Pair it with comforting soups or stews to complete the meal.
- Picnics: Slice it up for an easy, portable snack or sandwich base.
Whether you’re gathered around the table or enjoying a picnic in the park, small batch crusty bread will impress every time! For more delicious bread baking tips, check out King Arthur Baking or explore our other artisan bread recipes.
Time Breakdown for Small Batch Crusty Bread
Preparation Time
Gather your ingredients and mix the dough in just 15 minutes! It’s a straightforward process that sets the stage for delicious small batch crusty bread.
Rising Time
Allow the dough to rise for about 1 hour and 30 minutes. This step is essential for developing flavor and texture. Make sure it doubles in size for optimal results!
Baking Time
Bake your bread for 30 minutes, including a crucial lid-off step for that perfect golden crust. This is where the magic happens!
Total Time
From start to finish, expect a delightful 2 hours and 15 minutes. Perfect for a lazy weekend or an afternoon baking session! Enjoy your homemade creation, and feel free to check out more about bread making techniques in our Everyday Artisan Bread course.
Nutritional Facts for Small Batch Crusty Bread
Calories per serving
This delightful small batch crusty bread contains approximately 150 calories per serving, making it a perfect, indulgent addition to your meals without tipping the scale.
Key nutrients
Each serving provides essential nutrients, including:
- Carbohydrates: A great source of energy for your busy day
- Fiber: Supports digestive health, helping you feel fuller longer
- Protein: Contributes to muscle repair and growth, essential for active young professionals
By enjoying this simple bread, you’re not just treating your taste buds; you’re also nourishing your body! For more detailed insights on bread nutrition, check out the USDA FoodData Central.
FAQs about Small Batch Crusty Bread
How to store homemade bread?
To keep your small batch crusty bread fresh, store it at room temperature in a bread bag or wrapped in a clean kitchen towel. Avoid plastic wrap as it can make the crust soft. For optimal freshness, enjoy within 2-3 days!
Can I freeze small batch crusty bread?
Absolutely! Freezing is a great way to extend the life of your small batch crusty bread. Once cooled completely, wrap it tightly in plastic wrap, followed by aluminum foil for added protection. It can be frozen for up to 3 months. To enjoy, simply thaw at room temperature or pop it in the oven for a quick crisp before serving.
What if my dough isn’t rising properly?
If your dough isn’t rising, don’t panic! Ensure your yeast is active; it should foam when mixed with warm water. If it doesn't, consider a new packet. Also, check your kitchen temperature—yeast thrives in warmth. If colder, find a cozy spot or preheat your oven briefly, turn it off, and let the dough rise inside. Need more tips? Check out this helpful guide on bread baking techniques!
Conclusion on Small Batch Crusty Bread
Recap of the Joy of Homemade Bread
There’s something undeniably magical about baking homemade bread. The aroma that fills your kitchen, the satisfaction of creating something from scratch, and the joy of sharing it with loved ones make every moment worthwhile. This small batch crusty bread is the perfect way to experience that joy without the commitment of a large loaf!
Encouragement to Try the Recipe
If you’re looking to add a little warmth and comfort to your kitchen, I encourage you to try this small batch crusty bread recipe. It’s simple, fun, and rewarding! Trust me, once you taste that warm, crusty exterior and soft, fluffy interior, you'll want to bake bread every week. Share your creations or any questions on your baking journey—I’d love to hear from you!
For more tips and inspiration, check out The Bread Lab to deepen your understanding of the science behind bread-making or dive into a few of my favorite bread recipes from our site. Happy baking!
Small Batch Crusty Bread
Equipment
- Dutch oven
- Mixing bowl
- spatula
- cutting board
- Linen napkin
Ingredients
- 1 teaspoon active dry yeast
- 1 teaspoon honey
- ⅔ cups warm water
- 1 teaspoon kosher salt
- 1 to 1 ⅔ cups All-Purpose Flour plus extra for dusting
Instructions
Mix the Dough and First Rise (1 Hour)
- Combine yeast, honey, and warm water in a large mixing bowl.
- Let the yeast proof for about 5 minutes, until the mixture looks nice and foamy.
- Add flour to bowl. Mix with a sturdy spatula until the dough starts to come together, then add salt and mix well, until no dry flour remains. Dough should be slightly loose, shaggy, and a bit sticky!
- Cover bowl with a clean towel. Let rise 1 hour or until doubled in size.
Shape the Dough & Final Rise (30 Minutes)
- When dough has risen, lightly flour a large cutting board.
- Tip dough out onto the board. Don’t punch the dough down - handle it gently to preserve all those air bubbles!
- Shape your dough into a round loaf by gently pulling each edge into the center like you’re folding an envelope.
- Dust a small mixing bowl with flour and place your loaf into the bowl seam-side down. Cover with a clean towel and let rise for another 30 minutes while you heat the oven.
Heat the Oven
- While bread proofs, place an empty dutch oven (with the lid on) in your oven and heat to 460° F.
Bake! (30 Minutes)
- When the oven is hot, tip your loaf - seam side UP this time - onto a piece of parchment paper.
- Use oven mitts to pull out the hot Dutch oven and remove the lid.
- Cook bread for 22 minutes.
- After 22 minutes, carefully remove the lid from your dutch oven. Continue baking, uncovered, for another 5-10 minutes to deepen the color.
- Transfer bread to a cooling rack and let cool at least 30 minutes before slicing.


Leave a Reply