
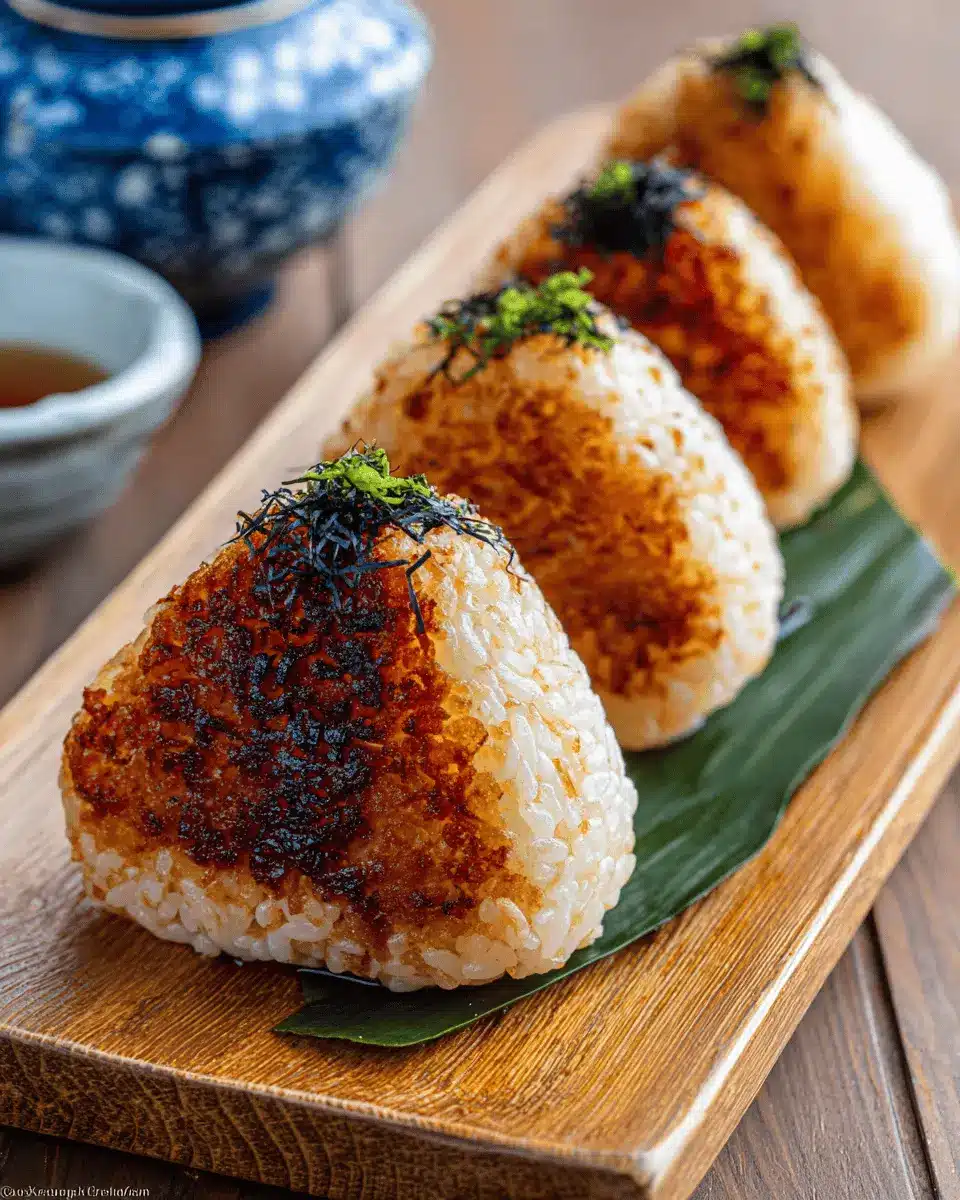
Introduction to Yaki Onigiri
If you’re seeking a quick, nutritious, and satisfying meal, look no further than yaki onigiri. These delightful grilled rice balls are not only bursting with flavor but also easy to customize to suit your taste. Imagine wrapping up your workday and having a warm, savory snack that’s as portable as it is delicious. Perfect for young professionals, yaki onigiri can serve as a tasty lunch or a comforting dinner after a long day at the office.
Why are yaki onigiri so appealing? For starters, they offer the perfect blend of efficiency and versatility. With just a handful of ingredients, you can whip up a batch in about 30 minutes, making them ideal for meal prep. And whether you're in the mood for something sweet or savory, yaki onigiri can cater to your cravings by incorporating various fillings, such as turkey bacon or chicken ham.
You don't need to be a culinary whiz to master this dish; just follow a few simple steps and you'll unveil a delectable snack that’s sure to impress. So, why not give yaki onigiri a try? Explore the joy of cooking with this traditional Japanese comfort food that perfectly aligns with a busy lifestyle! For more insights, check out the Japanese Cooking Academy for authentic techniques and tips.
Ingredients for Yaki Onigiri
When embarking on your yaki onigiri journey, having the right ingredients is essential for crafting these delicious grilled rice balls. Here's what you need:
Essential ingredients for Yaki Onigiri
- Japanese Short-Grain White Rice: The star of the dish! Aim for 2¼ cups of uncooked rice, ideal for achieving that perfect sticky texture.
- Water: 2½ cups will give your rice the moisture it needs to cook beautifully.
- Soy Sauce, Sugar, Toasted Sesame Oil, and Kosher Salt: These elements combine to create a delightful seasoning that enhances the rich flavor of the rice.
Optional add-ins for extra flavor
Want to elevate your yaki onigiri even further? Consider incorporating some optional add-ins:
- Cooked Proteins: Add fillings like chicken ham or turkey bacon for a savory twist.
- Vegetables or Seaweed: Chopped scallions, carrots, or even bits of nori can offer an extra crunch and burst of flavor.
- Cheese: A small piece of cheese can melt inside, creating a gooey surprise!
Experiment with these optional ingredients to personalize your yaki onigiri experience! For more inspiration on fillings, you might enjoy checking out resources from Just One Cookbook. Happy cooking!
Preparing Yaki Onigiri
Rinse and soak the rice
Starting with the right Japanese short-grain rice is crucial for making delicious yaki onigiri. Begin by rinsing 2¼ cups of uncooked rice under cold water. This step removes excess starch, ensuring your rice has the perfect texture. After rinsing, soak the rice in water for 20 to 30 minutes. This soaking time allows the grains to absorb some water, leading to fluffier rice when cooked. If you want to learn more about the importance of proper rice preparation, check out this guide on rice cooking.
Cooking the rice to perfection
Once your rice has soaked, it’s time to cook it! If you’re using a rice cooker, add the soaked rice along with 2½ cups of water. For stovetop cooking, bring the mixture to a boil and then reduce to a simmer, covering the pot for about 18-20 minutes. The goal here is fluffy, tender rice that still holds its shape—perfect for shaping into yaki onigiri.
Seasoning the cooked rice
After the rice is cooked, allow it to cool slightly. In a small bowl, mix 3 tablespoons of soy sauce, 1 tablespoon of sugar, 1 tablespoon of toasted sesame oil, and a pinch of salt. Heat this mixture in the microwave for about 30 to 60 seconds until the sugar dissolves. When the rice is still warm, gently stir in the seasoning with a rice paddle, using a slicing motion to avoid mashing the grains. This seasoning will give your yaki onigiri a delightful flavor boost.
Shaping the Onigiri
Now, it’s time to shape your yaki onigiri. You can use an onigiri mold for convenience or your hands for a more traditional feel. If using a mold, wet it first to prevent sticking, then fill it with the seasoned rice, pressing down firmly but gently. If shaping by hand, moisten your palms and take a portion of rice. Form it into a triangle, rotating and pressing gently to create defined corners. This step is crucial for achieving that distinctive onigiri shape!
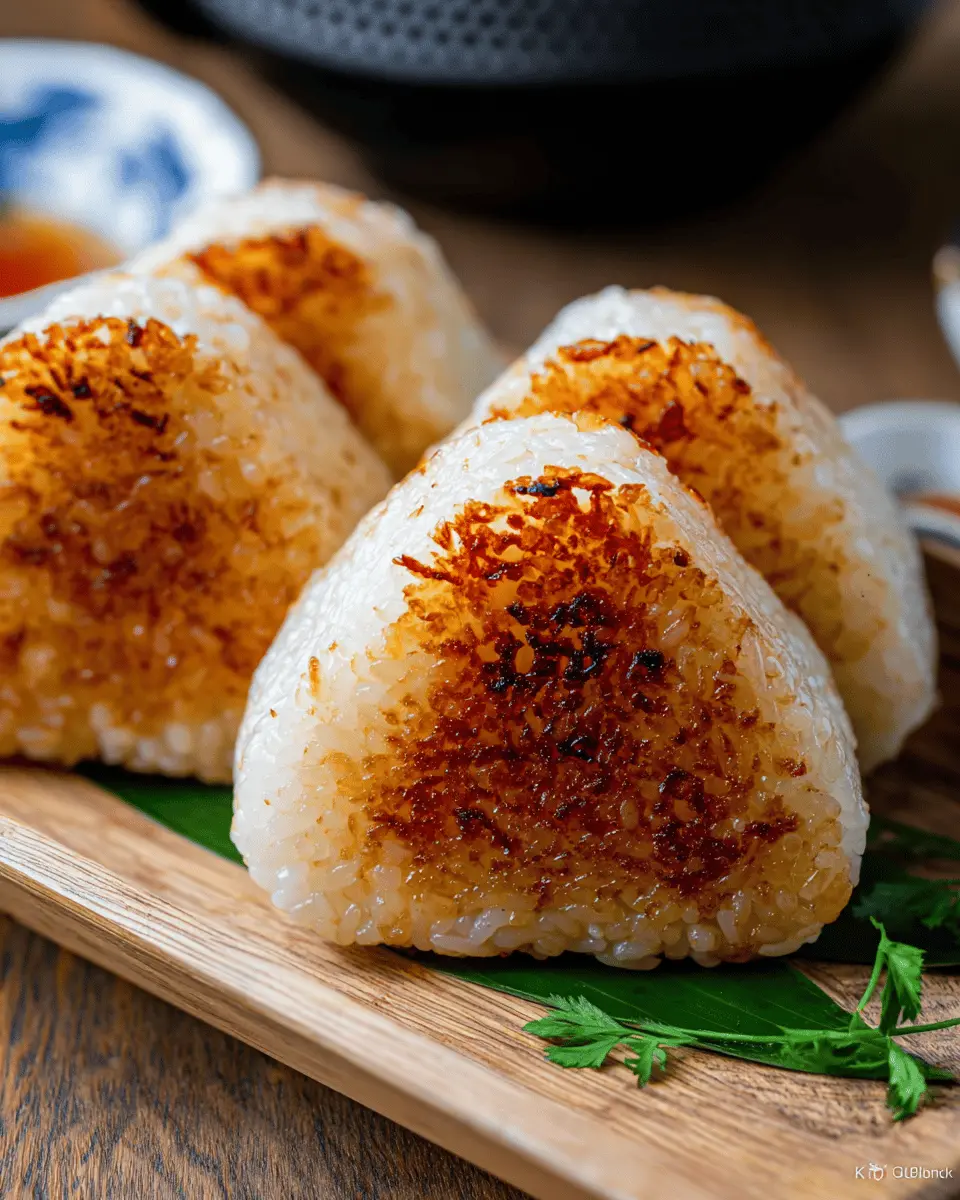
Pan-grilling the Onigiri
For that charming golden crust, heat a non-stick pan over medium-low heat. Place the rice balls in the pan, grilling each side until crispy and lightly browned. It’s tempting to flip them frequently, but patience is key here. Let each side develop a nice crust before turning. The result? A satisfying crunch that complements the soft, flavorful interior.
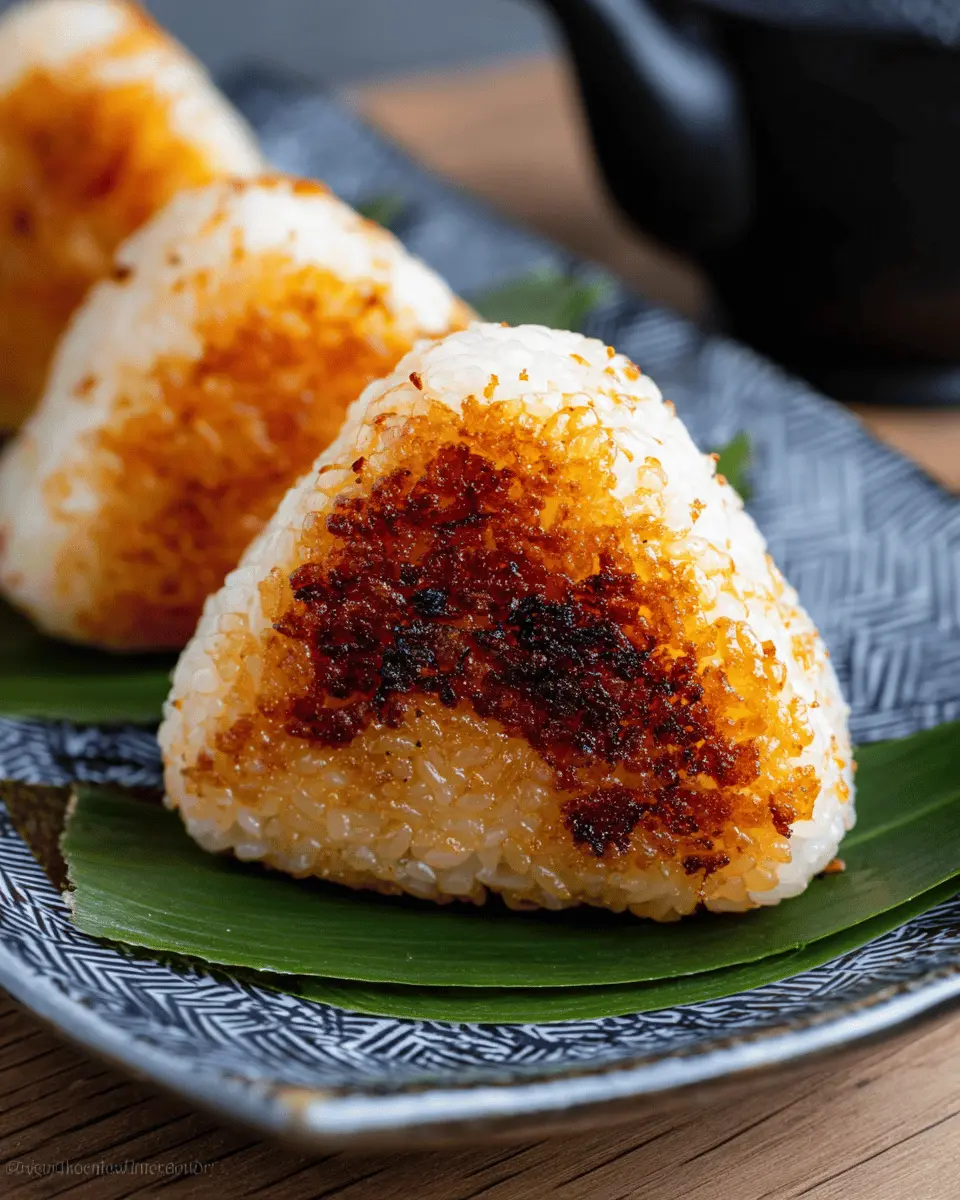
Glazing for that perfect finish
Once your yaki onigiri are beautifully grilled, it’s time for the glaze! Combine 1 tablespoon of soy sauce and 1 teaspoon of toasted sesame oil in a small bowl. Brush this mixture over the grilled sides and return them to the pan for a final crisp. This adds a beautiful sheen and an extra layer of flavor that transforms your yaki onigiri into a show-stopping dish. Serve and enjoy your homemade rice balls, knowing you've created something truly special!
If you're looking for more Japanese recipes, you might enjoy exploring these traditional delights.
Variations on Yaki Onigiri
Yaki Onigiri with Various Fillings
Once you’ve mastered the classic Yaki Onigiri, don't hesitate to explore different fillings! Traditional options include umeboshi (pickled plum) or natto (fermented soybeans), but why stop there? Think outside the box! Try filling your rice balls with:
- Turkey Bacon for a smoky kick
- Chicken Ham for a savory contrast
- Hearty vegetables like sautéed mushrooms or spinach
Each filling adds its unique flavor, making every bite an exciting surprise.
Creative Twists on Traditional Flavors
Take your Yaki Onigiri to the next level with unexpected flavor combinations. How about trying a spicy cilantro-lime mixture for a zesty Asian-Mexican fusion? Or a drizzle of Miso butter for a rich umami flavor? If you’re feeling adventurous, a cheesy filling with mozzarella or cheddar can make for a delightful twist on the traditional rice ball. Experimenting with flavors not only enhances the dish but makes for a fun culinary adventure!
For more ideas and tips on these variations, check out Just One Cookbook for authentic Japanese recipes!
Cooking Tips and Notes for Yaki Onigiri
Tips for Preventing Rice from Sticking
To keep your yaki onigiri from sticking, wet your hands and any molds or tools you use. This simple step works wonders, as moisture creates a barrier between the rice and surfaces. Additionally, using freshly cooked rice allows you to shape the onigiri while it’s warm, which helps maintain its texture and prevents clinginess.
Ensuring the Perfect Crispiness
Achieving that delightful crispiness on the outside of your yaki onigiri requires patience. Start grilling the rice balls on medium-low heat, allowing them to brown gently. Avoid flipping them too soon! The key is to create a nice crust by letting each side sit undisturbed until it’s perfectly golden. For an extra flavor boost, brush the onigiri with soy sauce glaze towards the end of grilling.
For more tips, check out Serious Eats which offers excellent advice on rice preparations!
Serving suggestions for Yaki Onigiri
Ideal Pairings and Side Dishes
Yaki onigiri are wonderfully versatile! You might enjoy them with:
- Salads: A light cucumber salad or a tangy seaweed salad complements the savory rice balls beautifully.
- Protein Options: Grilled salmon, chicken ham, or even turkey bacon can add a savory punch.
- Soups: A warm bowl of miso soup makes for a comforting pairing.
For something different, try serving with pickled vegetables, which provide a salty counterpoint to the umami flavors of yaki onigiri.
Presentation Tips for an Instagram-Worthy Meal
To make your meal pop on social media, consider these presentation tips:
- Color Contrast: Use vibrant garnishes like chopped green onions or shiso leaves for a splash of color.
- Arranging: Stack the onigiri in a bento box or on a colorful plate, adding small dividers or cups for side dishes.
- Lighting: Natural light is your friend! Photograph in well-lit areas to showcase the crispy texture.
These simple touches can elevate your yaki onigiri from your dining table to your followers' feeds!
Time Breakdown for Yaki Onigiri
Preparation Time
Getting ready for your yaki onigiri is a breeze, taking just 15 minutes. This includes gathering your ingredients and seasoning the rice.
Cooking Time
Cooking the rice and pan-grilling the yaki onigiri takes an additional 15 minutes. You'll be flipping those delicious rice balls until they’re perfectly crispy and brown!
Total Time
In just 30 minutes total, you can enjoy homemade yaki onigiri that’s golden, caramelized, and ready to impress your friends and family. Perfect for a quick snack or a tasty side!
For chef tips and detailed cooking methods, check out the full recipe!
Nutritional Facts for Yaki Onigiri
When you indulge in yaki onigiri, it’s good to know what you’re savoring! Here’s a quick nutritional overview:
- Calories: 207 kcal per rice ball, making it a satisfying snack.
- Protein: 4g, providing a modest boost to your daily intake.
- Sodium: 420mg, so be mindful if you’re watching your salt intake.
These grilled rice balls are delicious and a great addition to your culinary repertoire! For more insights, check out the USDA FoodData Central for detailed nutritional profiles.
FAQs about Yaki Onigiri
What is the best rice for Yaki Onigiri?
When it comes to making yaki onigiri, the best choice is Japanese short-grain white rice. Its sticky texture helps the rice hold together beautifully, ensuring that your grilled rice balls maintain their shape and don't crumble apart. If you can't find Japanese rice, look for other varieties labeled as “sushi rice”; they'll yield a similar result.
Can I make Yaki Onigiri ahead of time?
Absolutely! You can prepare yaki onigiri ahead of time. Once shaped and cooled, wrap each rice ball in plastic wrap and store them in the freezer for up to a month. Thaw them in the fridge overnight before grilling. This method not only saves time but also allows flavors to meld together beautifully.
What are some suitable gluten-free alternatives?
For a gluten-free take on yaki onigiri, make sure to use gluten-free soy sauce or tamari in your seasoning mix and glaze. Additionally, explore alternative fillings like grilled vegetables or tofu, which can elevate your rice balls’ flavor profile while keeping them gluten-free. If you're looking for more information on gluten-free diet options, check out Celiac Disease Foundation.
Conclusion on Yaki Onigiri
Yaki Onigiri offers a delightful twist to traditional Japanese rice balls with their crispy crust and savory glaze. Perfect as a snack or part of a meal, they bring a unique flavor to your table. Enjoy experimenting with various fillings and glazes to make these grilled rice balls your own!
For a deeper dive into Japanese culinary culture, check out Nami's Japanese Cooking for more delicious recipes!
Yaki Onigiri (Grilled Rice Ball)
Equipment
- Rice cooker
- Frying pan
- Onigiri mold
- Microwave
- spatula
Ingredients
For the Steamed Rice
- 2.25 cups uncooked Japanese short-grain white rice or cook 1½ cups (300 g) of rice for 5 rice balls
- 2.5 cups water or 1⅔ cups (400 ml) for 2 rice cooker cups
For the Rice Seasoning
- 3 tablespoon soy sauce or 2 tablespoon for 2 rice cooker cups
- 1 tablespoon sugar or 2 teaspoon for 2 rice cooker cups
- 1 tablespoon toasted sesame oil or 2 teaspoon for 2 rice cooker cups
- 0.25 teaspoon Diamond Crystal kosher salt or ⅛ teaspoon for 2 rice cooker cups
For the Glaze
- 1 tablespoon soy sauce
- 1 teaspoon toasted sesame oil
Instructions
Preparation
- Soak the Japanese short-grain white rice for 20-30 minutes.
- Cook the rice in a rice cooker with 2½ cups of water.
- Combine soy sauce and sugar in a bowl and microwave until hot.
- Add sesame oil and salt to the mixture and mix.
- Transfer hot cooked rice to a bowl and add the seasoning mixture.
- Combine the seasoned rice gently without mashing it.
- Use an onigiri mold to shape the rice into rice balls.
- Press the rice balls firmly to keep their shape.
- Optionally, shape the rice with plastic wrap.
Grilling
- Combine soy sauce and sesame oil for the glaze.
- Place rice balls on parchment paper in a frying pan.
- Grill on medium-low heat until crispy and lightly browned on all sides.
- Brush the sides with the glaze and grill the sauce side.
Storage
- Seal each yaki onigiri in plastic wrap and freeze for up to a month.
- If refrigerating, cover with a thick kitchen towel.


Leave a Reply